
 Save
Save
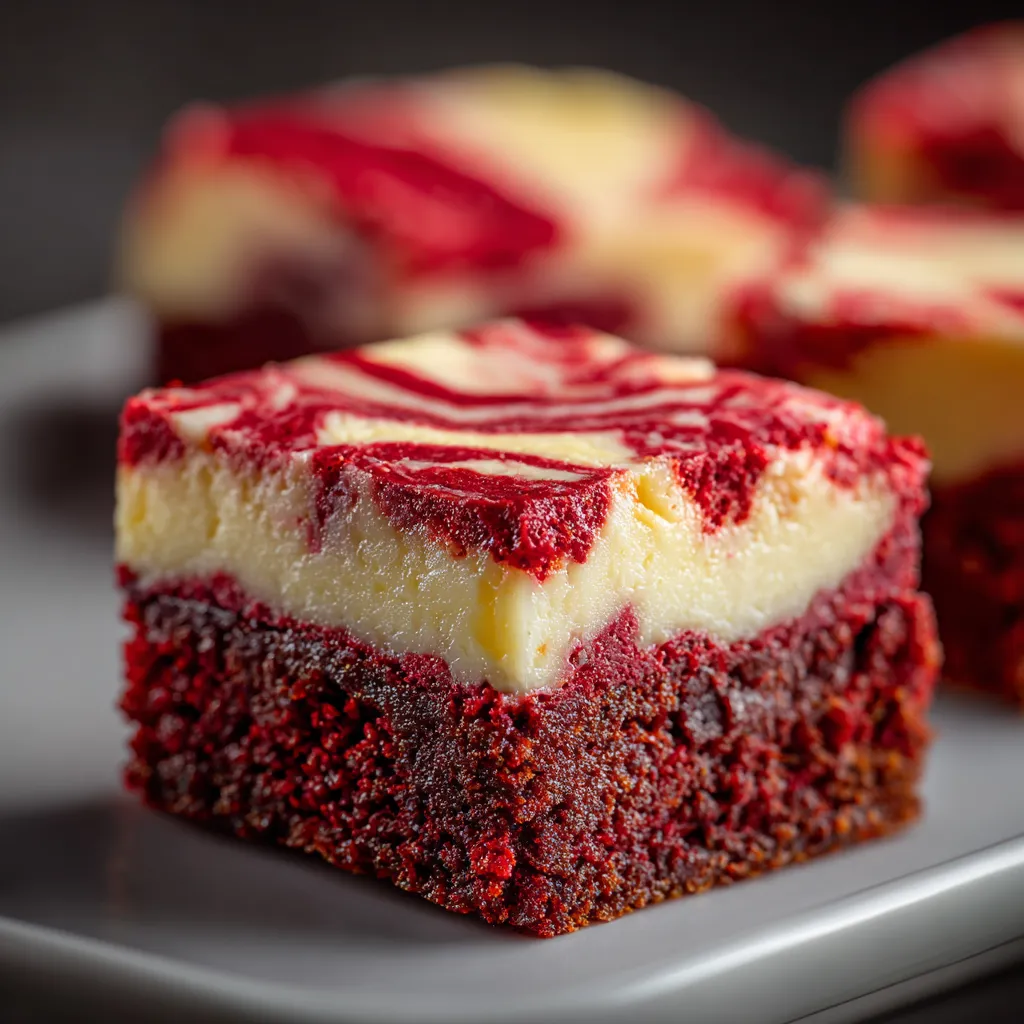
Red velvet cheesecake brownies blend two beloved desserts into one showstopper that looks as good as it tastes. The bold cocoa richness and signature red color of the brownies pair with a smooth tangy cheesecake swirl for a treat that always grabs attention at parties or potlucks. Whenever I make these for a get-together, everyone asks for the recipe before the pan is empty.
When I first tried these for Valentine’s Day, my whole family was instantly hooked. This is now the most-requested dessert whenever we have guests.
Ingredients
- Unsalted butter: melted for rich texture and classic brownie flavor choose a sweet cream butter for the best taste
- Granulated sugar: adds sweetness and a bit of chew always use fresh sugar to avoid clumps
- Large eggs: bind everything together and create that fudgy texture pick fresh eggs for best results
- Vanilla extract: deepens the flavor use pure extract for a fragrant lift
- Red food coloring: brings the iconic color choose gel for the boldest color with less liquid
- Cocoa powder: delivers rich subtle chocolate notes opt for Dutch-process if you want a more intense chocolate color
- All-purpose flour: gives structure to the brownies go for unbleached flour for the nicest crumb
- Salt: heightens all the flavors use a fine sea salt for best blending
- Cream cheese: softened for smooth cheesecake swirl select full-fat blocks for creamiest texture
- Granulated sugar (cheesecake layer): adds balance
- Egg (cheesecake layer): for creamy binding
- Vanilla extract (cheesecake layer): for warm flavor
- Tip: let cream cheese come to room temperature so it blends without lumps
Step-by-Step Instructions
- Preheat the Oven:
- Set your oven to three hundred fifty degrees Fahrenheit and prepare an eight by eight inch pan by lining it with parchment. Leave extra paper on the sides for easy lifting later
- Prepare the Red Velvet Brownie Batter:
- In a big mixing bowl whisk melted butter and granulated sugar until the mixture is glossy. Crack in eggs add vanilla and the red food coloring then whisk well until everything is combined and vivid red. Sift in cocoa powder flour and salt. Gently fold these in with a spatula until just mixed and no dry streaks remain. Take care not to overmix or the brownies get tough
- Make the Cheesecake Layer:
- In a separate bowl beat cream cheese and sugar with a hand mixer or firm spatula until silky and smooth. Add egg and vanilla blend again until the mixture is creamy with no lumps left
- Assemble the Brownies:
- Spread about three quarters of your red velvet batter evenly in the lined pan. Gently add the cheesecake mixture on top using a spatula to coax it to the edges without mixing the layers. Drop spoonfuls of the reserved red velvet batter over the cheesecake then use a butter knife or skewer to create pretty swirls and marbling on top
- Bake:
- Place the pan in the oven and bake for thirty to thirty five minutes. The center should look just set and a tester poked into the middle should come out with only a few moist crumbs
- Cool:
- Allow the brownies to cool completely in the pan on a wire rack. For the neatest slices you can chill the pan in the fridge for at least half an hour before cutting
- Serve:
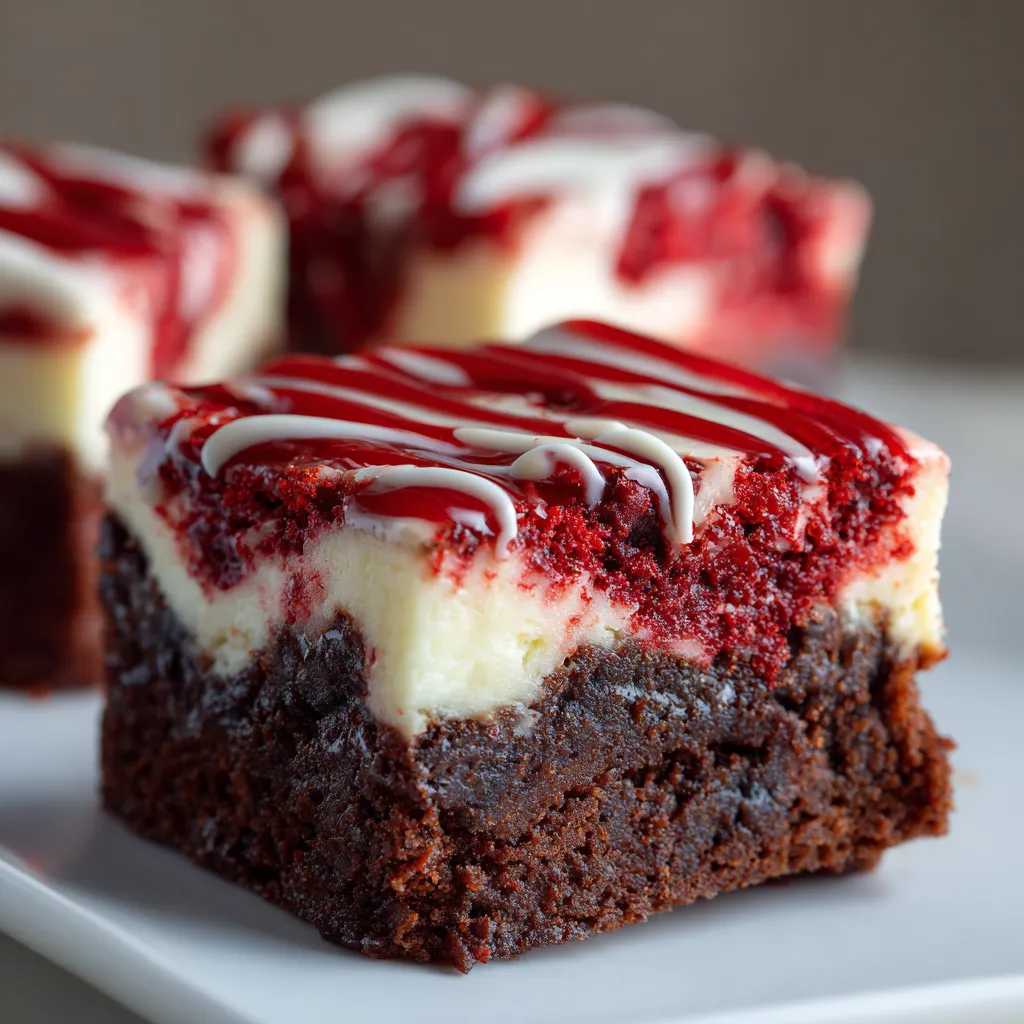
- Cut into squares and plate up as is or go all out with whipped cream or a dribble of chocolate sauce for those extra special occasions
 Save
Save
My favorite part is swirling the red velvet and cheesecake together. Every batch has a unique look and it always gets a wow when served. Once when making these with my niece she giggled at the marbling calling it dessert art
Storage Tips
Store leftovers in an airtight container in the fridge for up to five days. For longer storage wrap individual pieces tightly in plastic or foil and freeze up to three months. Let thaw overnight in the fridge for best flavor and texture
Ingredient Substitutions
If you prefer not to use red food coloring you can reduce it or leave it out but the brownies will have a more cocoa tan shade. To make gluten free use a cup for cup style gluten free flour blend. For a flavor twist swap in chocolate chips white or dark stirred into the red velvet batter before baking
Serving Suggestions
These brownies are gorgeous on their own but feel extra fancy with a scoop of vanilla ice cream or a dusting of powdered sugar. For a party platter cut small triangles for bite sized treats. During the holidays add a sparkle of colored sugar for festive flair
Cultural and Historical Notes
Red velvet cake has Southern US roots and became iconic with the use of cocoa and buttermilk for both flavor and color. In this recipe the deep red swirl is a modern mashup with classic cheesecake brownies making a dessert both nostalgic and trend forward
Recipe FAQs
- → How do you achieve the marbled effect in these brownies?
Drop spoonfuls of remaining red velvet batter over the cheesecake layer, then gently swirl with a knife or toothpick for a marbled look without blending completely.
- → What’s the best way to ensure clean slices?
Allow brownies to cool fully in the pan, then chill in the refrigerator for at least 30 minutes before slicing with a sharp, damp knife.
- → Can I use natural coloring instead of red food coloring?
Yes! Beet juice or a reduced amount of food coloring may be used for a subtle hue, though the vibrant red is signature to traditional versions.
- → How should these brownies be stored?
Store in an airtight container in the refrigerator for up to 5 days, or freeze for up to 3 months to maintain freshness and texture.
- → Are there mix-in options for extra flavor?
Stirring in white chocolate chips or dark chocolate chunks into the red velvet batter can add an indulgent twist before baking.
- → Do these brownies need to be refrigerated?
Yes, because of the cream cheese layer, refrigeration helps preserve their texture and safety, keeping them fresh for several days.